.comment-link {margin-left:.6em;}
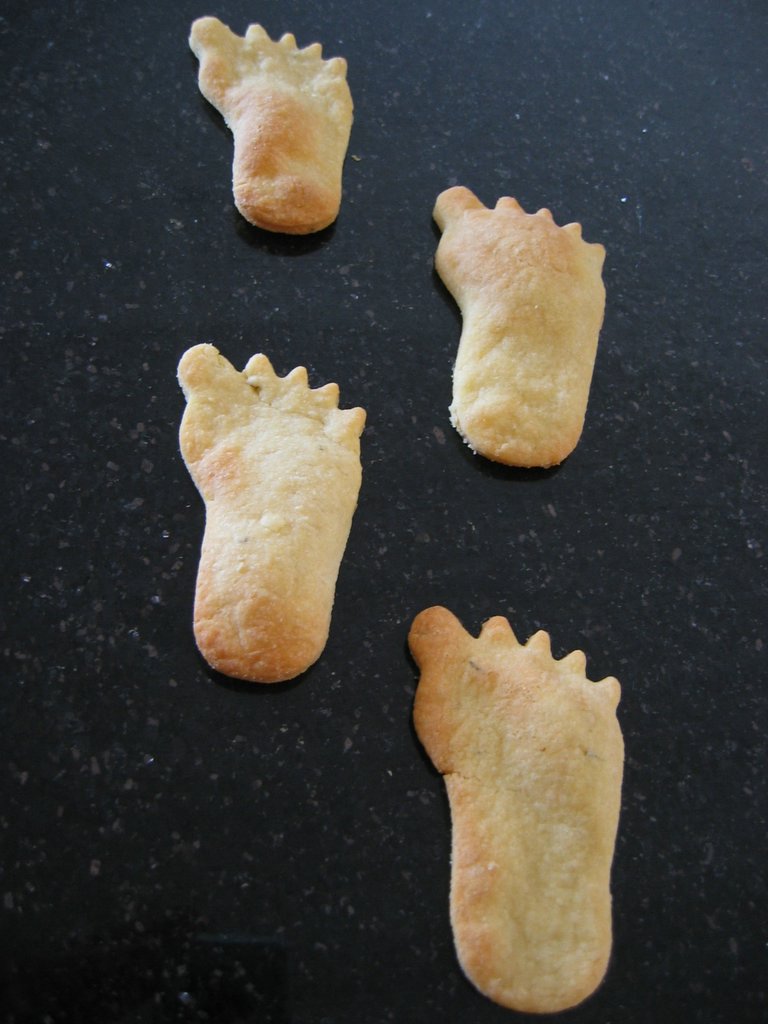
Cheesy Feet!

.
Wheee! Pongy! Feet that smell like cheese!
Now, who hasn't seen this recipe in Nigella's Feast and not got the giggles? And tucked it away as something you've just got to try in the future. I've wanted to for a while, and when I saw a foot-shaped cutter in my bread baking store I had that thing at the counter before you could blink.The problem is, you've really got to pick your audience. Who's going to appreciate cheese biscuits in the shape of feet? Even Nigella says she would back off from serving them to grown-ups, as that "mixture between yukky and cute might not play so well there. I wouldn't want to embarrass myself, you do see."Evidently I don't have the same reticence. Heh. I had to bring a plate to a concert of songs from musical theatre, so I thought the crowd would be "worldy" enough to have a laugh. And it really worked; they were a great talking point, and many people came back with a friend to show them. They were also one of the only savoury offerings on the table, which helped them to disappear. The only thing was that I was expecting more of a cheesy shortbread texture, but mine puffed up in the oven and turned kinda chewy. Possibly I overworked the mixture and/or left them in the oven a few minutes too long. Fan-forced ovens should be turned down about 10 degrees celcius too, which I didn't do. Guess I'll just have to make them again and find out! :-)Read on for the recipe:
Cheesy Feet
From "Feast"
100g Cheddar cheese, grated
25g soft butter
50g plain flour
1/4 teaspoon baking powder
-Preheat oven to 200C (lower if fan-forced)
-Dump all ingredients into a food processor and mix until the dough comes together. It may take a while. Form into a fat disc, wrap in plastic wrap and rest in the fridge for 15 minutes.
-Sprinkle your work surface with flour and roll out dough to ~3mm thickness. Cut out feet. The dough can be re-rolled until it is all used up.
-Place on a lined baking sheet and cook for about 10-12 minutes. Remove to a wire rack to cool.
-Biscuits will continue to crisp up as they cool, so take them out of the oven when still a little soft in the middle. -Makes about 16ish.
Tagged with cheese
Continue reading
'What's for Pud?'...Rhubarb & apple cornmeal cake
 This is my belated entry into the St George's day celebration of English puddings, hosted by Becks & Posh and Monkey Face. I did hope to be a bit more organised, but hey, I'll play on the whole Australia is a day ahead thing.My immediate thought when faced with the challenge of an English pudding is a treacle tart, straight out of my favourite Enid Blyton books. HURRAH! Let's find us some deserted cave and watch out for smugglers...and who's got the potted meat?? I don't think I've ever had treacle tart, and was a bit disappointed to discover it doesn't even contain treacle!! (it uses Golden Syrup!!)But basically, it's a public holiday today and I'm lazy and couldn't be arsed making my own pastry. Also, I had a dish of stewed rhubarb from my grandmother's garden up in the country. Is there anything that is more British-sounding than rhubarb? I know Nigella's books are chock-full of the stuff. I flicked through my favourite British books - poring over Nigel Slater, Jamie Oliver, Simon Hopkinson, Hugh Fearnley-Whittingstall and some god-awful blue hardcover thing we have from the 60s that wants suet and lard in everything, but it was back to Nigella where I found a veritable abundance of choice. If I'm going to bake something I wanto someplace to take it, because believe it or not from the content of this blog, I'm actually on a low-carb diet (!). Things I bake I generally take to rehearsals for my friends to eat. Only Nigella had something other than crumbles and jellies, which aren't really easily portable! Now, I've always though of rhubarb as a winter thing. My mum would make apple and rhubarb crumble on cold winter's nights, but I've noticed British foodbloggers get very excited about its short season around their springtime. Hmmm - I guess an English springtime is about equivalent to a Melbourne winter, eh? ;-) But, acording to Stephanie Alexander, Australian rhubarb is a year-round crop and is always pink and non-stringy. Rhubarb all year 'round for us! I was very tempted by Nigella's rhubarb kuchen (being the dab hand with yeast I now am...) but kuchen really isn't very trad English, is it? Plus the rhubarb had to be in pieces, not in slush.
So, I discovered her rhubarb cornmeal cake. It used cornmeal and yoghurt -both of which I had available, and it didn't seem to matter if the rhubarb was in sludge form, so that was my choice. I didn't have quite enough rhubarb slush, so I added an apple which I chopped into little pieces and zapped in the microwave. The point of the cornmeal is to absorb the excess liquid the rhubarb will give off, which is does well. It also gives a nice texture and crunch. If I were being truly English, I would have made up a nice custard to go with this; the combination would work really well. Nigella suggests a muscat-mascarpone cream, which I'd love to try one day. But for today I've just gone the double cream option.This is a pleasant, tea-time sort of cake. It's not intense in flavour, but so many British puddings are not. I think it was Bill Bryson who commented about the British fondness for such "cautiously-flavoured treats", as though too much flavour was some kind of extravagent indulgence. I think he was referring to British sweet biscuits at the time, but it never fails to make me laugh. Read on for the recipe:
Rhubarb & Apple cornmeal cake
Adapted from Nigella's "How to be a Domestic Goddess"
~250g cooked rhubarb (stewed with some sugar)
1 apple, chopped into small pieces and cooked until softish
150g plain flour
200g caster sugar
1 teaspoon bicarbonate of soda
1/3 teaspoon salt
1 teaspoon ground cinnamon
155g fine cornmeal (polenta)
2 eggs
1 teaspoon vanilla extract
125 soft butter
250g (note: not mls) natural yoghurt
23 cm springform cake tin, greased.
Preheat oven to 180c
Mix the flour, bicarb, salt, cinnamon and cornmeal together. Beat the eggs with the vanilla in a small jug or bowl.
In a large bowl, cream the butter and the sugar, then gradually add the egg mixture, beating all the while.
Add the flour-cornmeal mixture alternately with the yoghurt. Don't overmix.
Add the rhubarb and apple and fold through. Pour into the prepared tin and bake for about 1 hour. Check to make sure it is not browining too quickly; it may need to be covered with some tinfoil. Let cook in its tin before turning out.
Tagged with: What's For Pud? and St George's Day
Continue reading
One-bowl chocolate citrus cakes (and a theory)
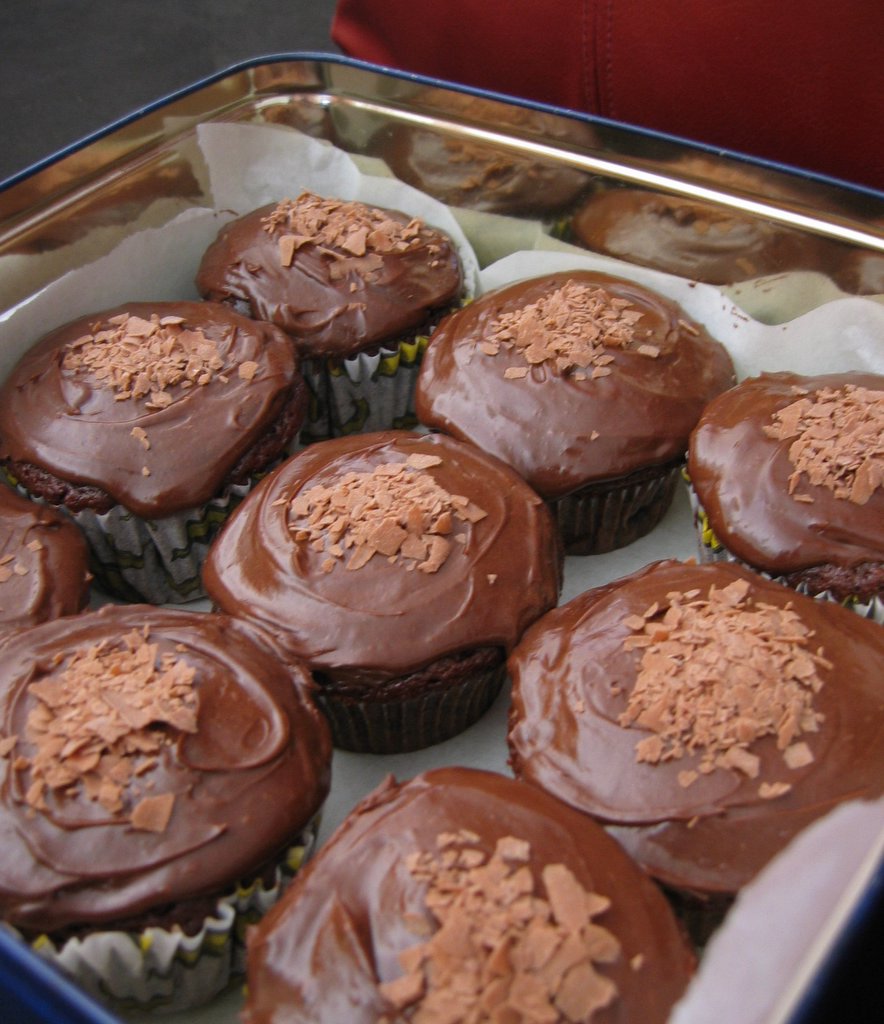
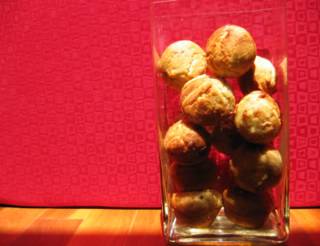
 When I posted about the one-bowl chocolate cherry cake a few weeks ago I also meant to include this photo of the cupcakes I made using the same technique; but with a jar of the (bitter!) grapefruit marmalade I made last winter. I took these to a market stall, where all except one were bought by the one person who was off to lunch at her daughter's house. I kind of hoped she wasn't going to give them to her grandchildren; with dark chocolate, not a lot of sugar and bitter marmalade, these were definitely for adult tastes!
I had an email today from a reader telling me of an article in the Pittsburgh Post-Gazette about a one-pot chocolate cake showdown. Recipes were made from recipes by Martha Stewart, Amanda Hesser, Nigella Lawson and Shirley Corriher. The article included the usual criticism of Nigella's recipes I have come to expect from US writers (I'm sorry!!). I find it really interesting that the criticism of Nigella’s recipes generally come from the USA – and I have a theory about this. I feel it's not actually to do with her, but with her American editors who are converting her recipes to American-style cup/volume measurements. Nigella's recipes use the more precise measurements by weight, which, when baking is really what you should be doing. Baking, by its very nature is all about accuracy, therefore you really need to weigh your dry ingredients rather than add them by volume. Volume measurements change depending on whether you "swoop or scoop", the humidity of the day, the altitude etc.etc. They're just not accurate enough, and this was reinforced when I went to my bread baking class this week and we were told always to bake by weight not volume. I do believe this was the case in this article because they complain about having to measure 3/8 cup of sour cream! Hehehe. In my Nigella books all her sour cream measurements are in millilitres, which are much easier to measure.
I find it really funny that the Brits & Aussies/Kiwis generally rave about her recipes and the Americans find them really inaccurate. The measurement systems are different. Doesn’t that say something?!?!? Now I openly admit that I might be wrong about this, so I'm happy to hear anyone else's opinions - either about Nigella's recipes or the baking by weight VS volume argument.
Continue reading
Chocolate Cherry Brownies
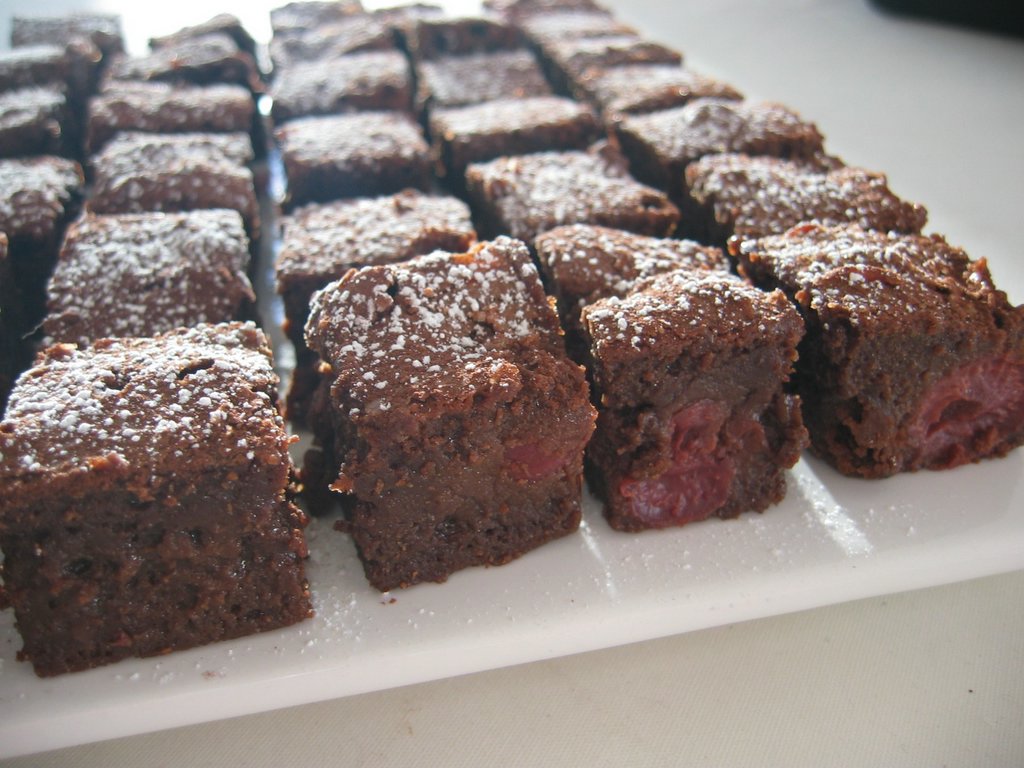
 Again with the chocolate and cherry?? Heh, well, theyr'e a good combination, and when I saw this recipe on Deborah's site, I immediately bookmarked it to make ASAP. I love brownies and I love bottled sour cherries. Combining the two? Why hadn't I thought of that before?!This is definitely not a low fat recipe. It has a whole block of chocolate plus a bit more, a whole packet of butter plus a bit more and 5 eggs. Ahem. But as I was taking it for an Easter day brunch, I rationalised that it was a time to indulge and celebrate, particularly as we'd just spent a stupidly large number of hours in singing in church services during Holy Week. I found the cooking time for this wasn't enough. I took the pan out after 25 minutes, left it to cool on the bench and slice it up when it was cold. To discover it was still liquid in the centre. Hmmmm. This may have been because I doubled the amount of cherries in the batter. So, I had to return them to the oven, already cut up for about 10 minutes. If you decide to double your cherries, watch your cooking time. And ensure the cherries are well drained. The liquid left behind makes a great drink mixed with soda water! I also reduced the amount of sugar to 300g because 400g sounded quite a lot! I think reducing sugar can have an effect on moisture absorbtion too. Next time I would add some cocoa powder to the batter. Chocolate in brownies gives a great texture, but it lacks the intensity of flavour cocoa gives. I think the best brownies are made with a combination of the two, although I did discover a brilliant recipe from Cooking With Amy about 2 years ago, which only uses cocoa.Read on for the recipe:
Chocolate & Cherry Brownies
From Green and Black’s Chocolate Recipes: Unwrapped - From the Cacao Pod to Muffins, Mousses and Moles
300 g unsalted butter
300 g dark chocolate (minimum 60%, broken into pieces)
5 large eggs
400 g granulated sugar
1 tablespoon vanilla extract
200g plain flour
1 teaspoon salt
100 g of drained morello cherries (I used about 200g)
Grease a roasting or baking tray.
In a bowl (placed on top of a pot of boiling water) melt the butter and chocolate together until thick and creamy
Meanwhile beat together sugar, eggs and vanilla extract until thick and creamy. The mixture should easily coat the back of a spoon.
Once the butter-chocolate mixture has melted, remove from stove and beat into the egg mixture
Sift the flour and salt together, and add to the wet ingredients. Mix until mixture is well combined.
Drain morello cherries and fold into the brownie mixture.
Pour mixture into the tray and bake for 20 - 30 minutes at 180C
Once finished baking, allow to cool and cut into pieces. Tagged with baking
Continue reading
2nd loaf
 "Second loaf, same as the first, but a little bit louder and a little bit worse!!"
Hehe. Thankfully not. As a dutiful bread baking student I did my homework and made another loaf so I wouldn't forget how it's done. I'm pleased to note that, despite some panicky moments when I thought I'd killed my dough because it was sulking and not rising (cold kitchen) it came to life and transformed itself into this rather tasty light rye loaf, which I took to rehearsal this morning. Sorry, Belinda - maybe I'll try coffee scrolls next week??
So, it seems I can bake bread now. Mabe I should stand on top of a skyscraper and beat my fists against my chest.
Nah, on second thoughts, that'd really hurt.
Continue reading
Hands-on bread baking class
 Rye bread rollsI have the computer back - yay! - and I'm currently on 2 weeks holiday - yippee! There's lots to catch up on with the backlog of posts I have, but I'll start most recently. Yesterday I went to a 1/2 day hands-on bread baking class at a place I've been visiting for a while to stock up on my Dutch cocoa and other baking bits'n'bobs. Those who've been reading a while know of my irrational fear of yeast. I seem to have enormous difficulty trying to make anything that involves yeast and it really pi**es me off! Witness my very first attempt at hot cross buns . Ahem! I don't feel like a "real" home cook unless I've mastered bread. And none of this poncy bread machine rubbish - real, get-your-hands-dirty stuff. I did manage to make a proper, hand-made wholemeal loaf last year that really impressed me, but its flavour and texture were still lacking a little.Marg & Maree's Baking & Breadmaking offer all kinds of classes and demonstrations, and as I'm on holiday and have time for self-indulgence I decided to go along and see how bread making is really done. After I came home with something like 5 kilos of bread I thought I'd gone a bit overboard, especially as I'm not really eating bread at the moment. But that's gone out the window; this bread is goooood!
  White loafThere's a maximum of 6 participants, so the class is very personal and friendly. After a bit of a talk about the properties of bread baking we took control of a bowl of dough that Maree had made up early that morning. Because of time contraints, and the amount of time needed for bread to rise a couple of times, we started off with this dough that had already had its first rise. With this we were to make a plain white high-tin load - as pictured above. My first time with soft, risen bread dough was a revelation; the stuff actually feels warm and alive! A bit off-putting at first. And if you're not bossy and authoritarian with it, it just will not behave for you. We were told kneading or pumelling wasn't required; just work and shape our dough, but with firm movements. Also chucking a whole lump of dough into a tin means the loaf won't cook well (too dense) so we were instructed to either roll it up like a swiss roll or divide it in two balls and place in the tin. As you can see my two balls were a bit uneven in size. Oops. Not being able to stop when something is simple and perfect (I'd never make a good artist) I got excited with a random mixture of seeds, grains and polenta over the top. Added fibre! Also makes it easier to identify your tin. This bread is top stuff- it's not soft or fluffy like you'd buy in Baker's Delight, but that's a Very Good Thing. Our teacher believes the bread they sell in commercial bakeries is undercooked, so as to achieve that soft, fluffy, insubstantial texture.
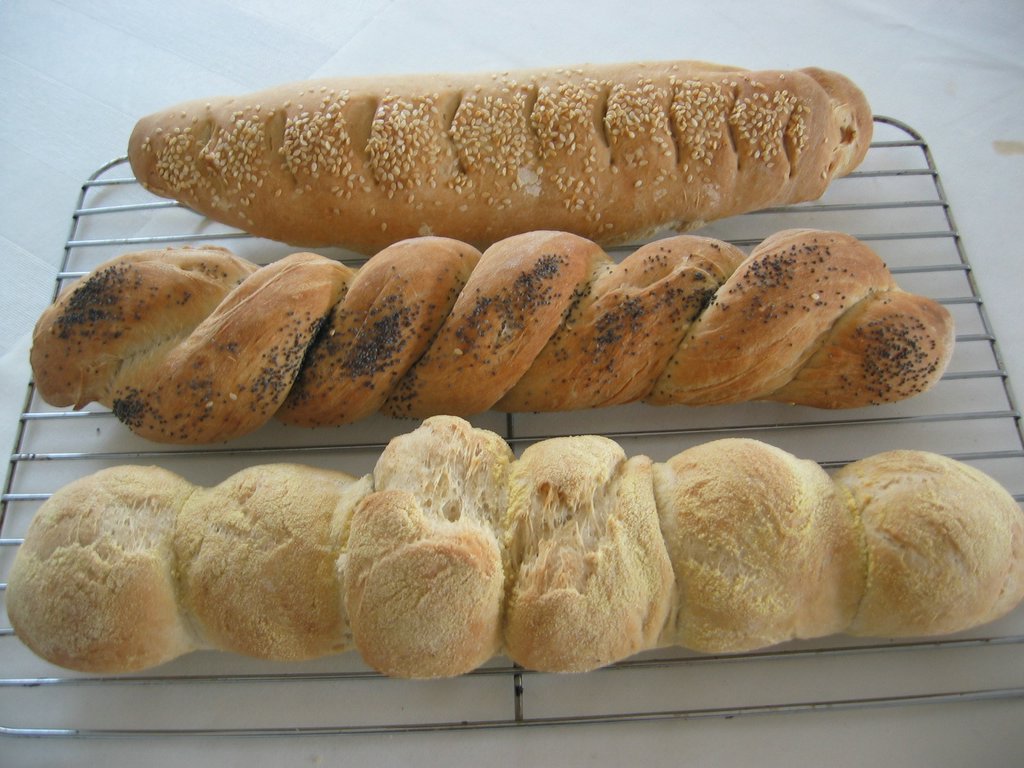
 Spelt french sticks
We then moved onto french sticks. This was fun because we now got to start off our dough from scratch. Because I have some friends on wheat-free diets I asked if I could make some spelt-flour bread. Spelt is an ancient grain used by the Egyptians and Romans, and a member of the wheat family. Many who can't tolerate wheat can have spelt, but not those with Ceoliac disease, because it still contains gluten.We were shown various ways to shape our bread and encouraged to try a few. I'm quite impressed with my twisted loaf! The bottom loaf is simply a whole lot of balls of dough. You can pull each one off for a small dinner roll, but I didn't have huge success with shaping my balls, as you can see! Because we were slightly short of french-stick baking trays (they're very cool - like corrugated iron) everyone could only bake two sticks. Because I had "special" bread I got to bake all three. Hehe. There's a tip for you if you want to take home extra bead!
The spelt flour worked really well. I would have preferred to make a spelt load and plain french sticks, but this was better than I expected. I can hardly tell a difference in texture between the two types of flour.
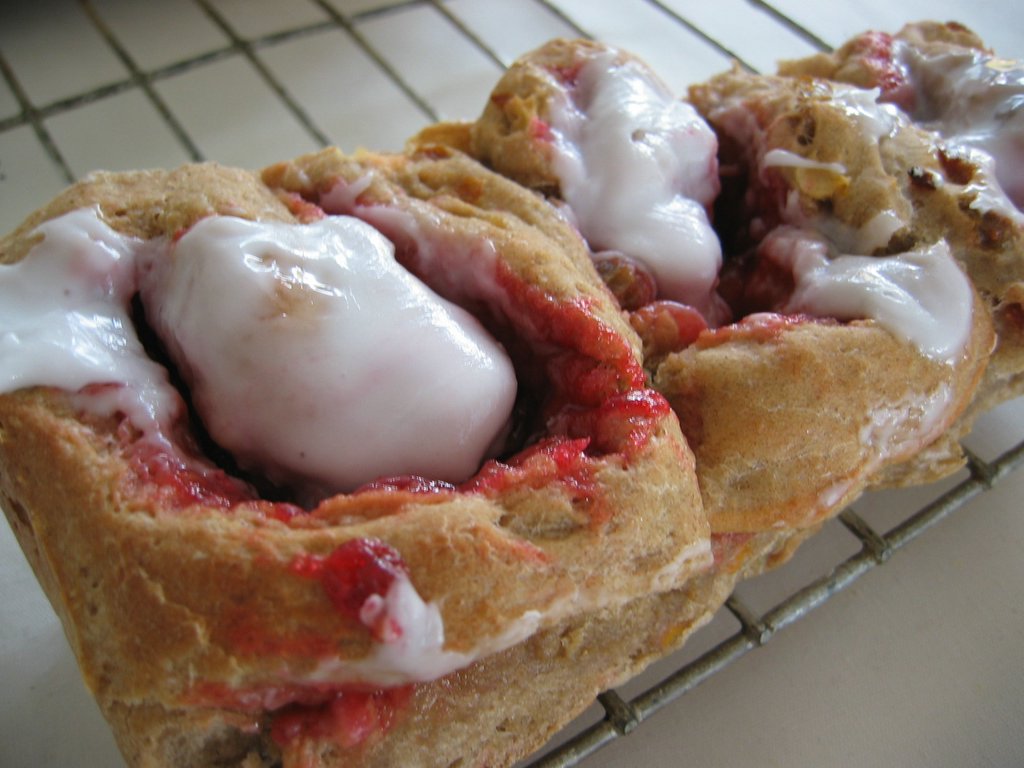
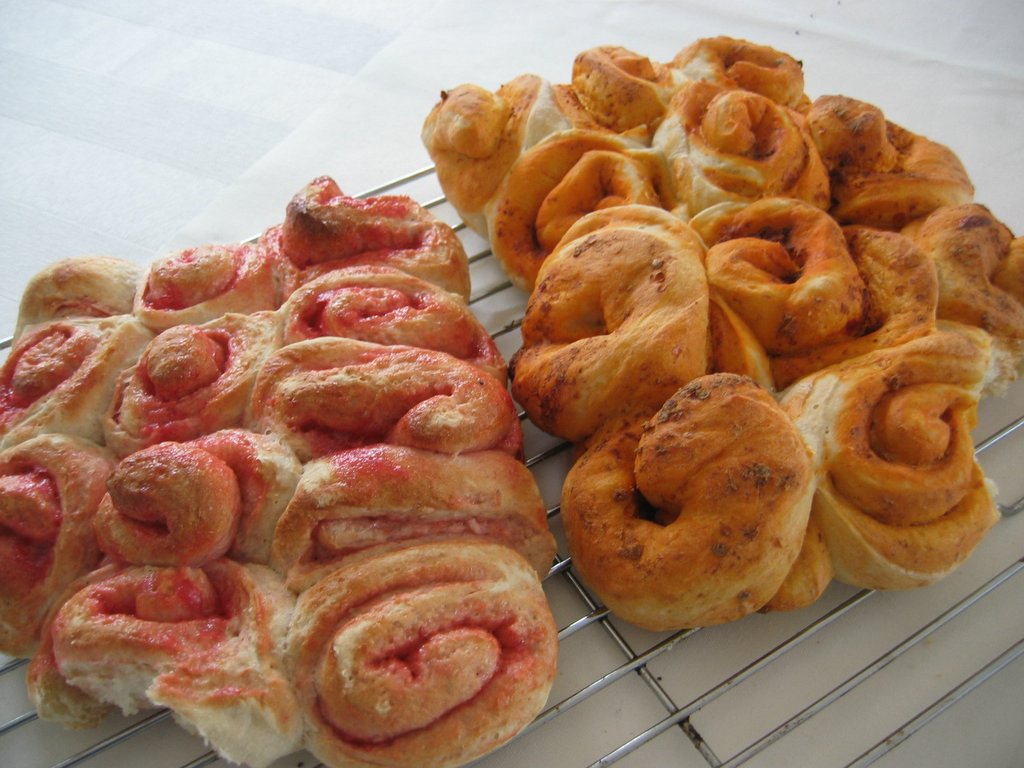
 Bonus buns!We then moved onto large bread rolls. This time I chose to experiment with some rye flour. You can't use rye on its own because it's too soft so you need to use a base of half plain white flour. From that I added 1/4 light rye and 1/4 dark rye. I was the only one who took this route so it was easy to keep track of my bread! Again we were shown various ways to shape it and encouraged to try them. Knot rolls, Kaiser rolls, Hamburger buns, Plaits, coils, flowers etc.etc.etc. We were make 6 rolls but would only bake three in indivudual tins; the three I chose are in the picture at the top of the post. I'm particularly pleased with my knot roll; it came out perfectly!Now I'm going to give you a little tip if you're greedy or covetous (I am both). You only get to bake 3 rolls. After that you're given a demonstration of how to make coffee scrolls, using a soft bun mix and lots of spices. Because of time contraints you don't get to sample these buns as they're still rising when the class ends. However, if your daily activities take you past the shop later in the day OR if you are wiling to hang about and lend a hand with the cleaning and washing up later, you are welcome to take some of these home for yourself. It's only an extra 1/2 hour or so. And I highly recommend sticking 'round just to sample the coffee scrolls - rolled up around raspberry jam and iced with fondant. I got to take 3 home. Mmmm.Additionally, the 3 extra bread rolls that weren't placed in individual roll tins and baked were placed in a scroll tin to show us a different baking technique - the "pull apart" roll thing. You can request these to be baked as well if you want to hang about. The woman who shared her tin with me had already gone home so I scored an extra 3 wholemeal bread rolls. Bonus!
  Sweet coffee scrollsAt the very end of the class, after showing us the coffee scroll, we used some spare bread dough we had to try the technique ourselves. These were just for practice and were going to go in the bin. Good food going in the bin?? I don't think so! I asked to take my raw, rolled-up dough home with me (I wasn't the only one...) so I baked these up at home. They're a little worse for the wear from the fact the bag fell onto the floor of the car when I turned a tight corner too fast, but hey... One set is rolled up with raspberry filling and the other with some very spicy sambal oelek. Again, a bonus for the tenacious!
 I really recommend this class. I did it on a weekday, but they're also offered on Saturday mornings. They're also offering a chocolate decorating workshop, which I think I'll be enrolling in pretty soon!Cost for the 1/2 day was $65, and includes all ingredients plus the advantage of taking a heck of a lot of bread home with you. Our homework is to make another loaf this weekend so we dont' forget what we've learned. Lucky bread freezes well.....
Marg & Maree's Baking and Breadmaking54 Bell StreetHeidelberg Heights VIC 30819455 1611
Continue reading
Chocolate cherry cake
 I've made variations on this cake a number of times. The method for it is incredibly simple; it's all made in one saucepan! Do try it - it's difficult to go back to multiple bowls and implements after these sorts of cakes. This a very simple chocolate cake I found in Nigella's "How to be a Domestic Goddess". It deviously appears twice; once as a full cake with orange flavouring, and once as cupcakes with cherry tastes. In both instances the flavouring is provided by adding a jar of jam to the mixture, which is not nearly as sickly sweet as you'd expect.Almost exactly a year ago I made cupcake versions of this cake, using bottled cherries rather than the cherry jam she suggests, and on several occasions I've made the chocolate orange store-cupboard cake using jars of the very bitter grapefruit marmalade I attempted making last year (I don't mention what's in the marmalade cos I don't think "chocolate grapefruit cakes" sound terribly tempting, to be honest. I get around this labelling 'issue' by going for the generic "chocolate citrus cakes!". Seems to fool the punters sufficiently...) Seriously, this is a cake you can whip up and have in the oven in about 10 minutes, and you'll have nothing to wash up afterwards except 1 saucepan and a few spoons. Plus, it looks pretty damn fine, doesn't it? This is the first time I've managed to get my chocolate ganache absolutely perfect. That gorgeous texture that starts to run photogenically down the sides of the cake but sets just in time. Previously I've always beat the ganache too long so it turns out like cake icing or whipped cream. Still pretty, but nothing like this. I'm very happy with this attempt! :-) Let's hope it wasn't a horrible aberration.Update 13 April: I've just changed the cooking time and ingredients for this, as I used the recipe from when I made it in cupcake form and realised I hadn't updated all sections. If you've printed it out already I suggest doing it again! So sorry! Read on for the recipe:
Chocolate Cherry Cake
adapted from "How to be a Domestic Goddess"
Cake:
125g soft butter
100g dark chocolate, broken
300g cherry jam (good stuff with not too much sugar added) 100g sugar (Nigella uses 150g. Up to you how sweet you want it)pinch of salt
2 large eggs, beaten
150g self-raising flour
Icing:
100g dark chocolate
100ml double cream
Preheat oven to 180c/gas mark 4
Melt the butter in a heavy-bottomed saucepan. When nearly completely melted, stir in the chocolate. Leave for a moment to begin softening, then take the pan off the heat and stir with a wooden spoon until the butter and chocolate are smooth and combined. Add the jam, sugar, salt and eggs. Stir with a wooden spoon and when is all well acombined stir in the flour. it's ok to have chunks of the jam still visible; desirable in fact! Pour into a buttered and floured 20-22 cm loose bottomed cake tin. Bake at 180˚C oven for 45-50 minutes, until the cake has set (test with a knife or wooden stick).
Cool in the pan on a rack for 10 minutes before turning out.
When the cake is cool, break the chocolate for the icing into little pieces and add them to the cream in a saucepan. Bring to the boil, remove from the heat, let cool in the fridge for about 20 minutes, and then whisk until thick and smooth.
Continue reading
Blue cheese, walnut & marsala spread
 Ho hum. Our computer is still broken. The motherboard crashed, which really shouldn't happen after such a short period of time. So it's sitting in a warehouse somewhere, and who knows when we'll be getting in back. Ho hum. So, I'm attempting to vaguely keep in touch with the world from my desk at work after hours. Ho hum.
I'm building up quite a collection of things to post about, not the least being my birthday celebrations last week, which involved a fantastic lunch and many presents with culinary themes. I hope to show you soon.
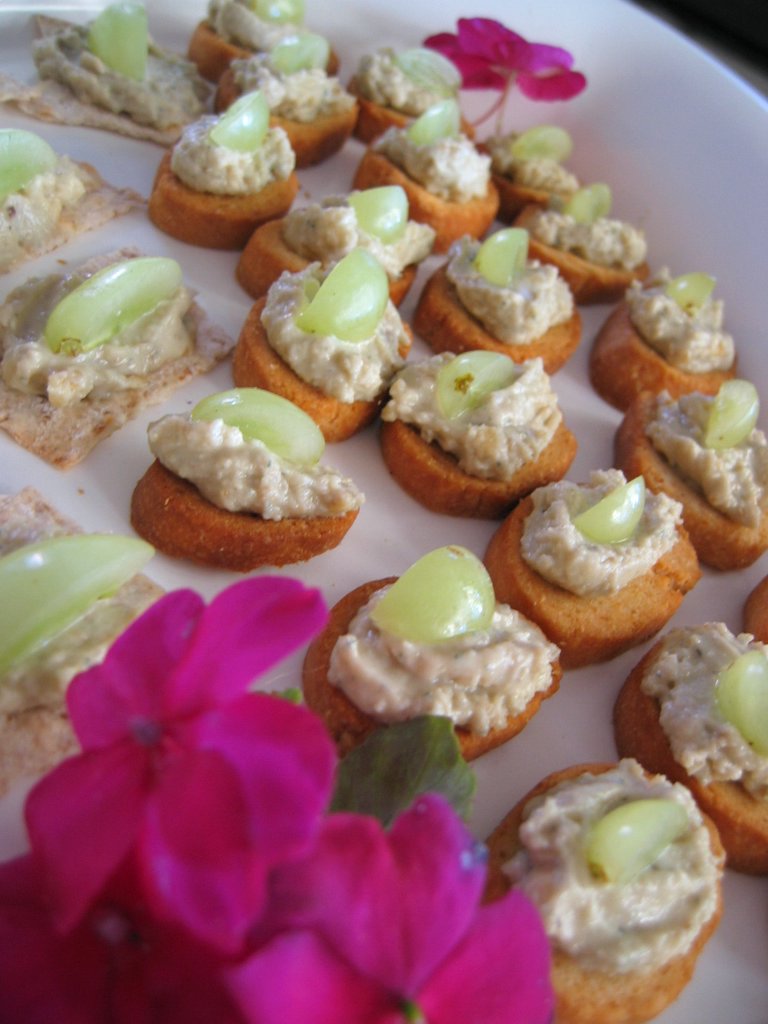
It's lucky that a few weeks ago I posted some photos and saved them as draft posts. It's all I've got, but it is something! What I found today is another canape topping for bits of crostini or cripsbread or crackers or whatever. It's the other canape I made for my friend party; the first being the egg and black truffle salsa, and is a slight variation on the gorgonzola and marsala canape topping from Nigella's How To Eat. I love the combination of blue cheese and sweet wine, so this idea grabbed me, plus it looked very quick and easy to whip up. Nigella recommends gorgonzola, but I was stingy and bought a wedge of that cheap foil-wrapped blue cheese you get in the dairy cabinet up near the Philly Cheese and Mini Baby Bells. I think it's from Denmark, and it costs about $2. I love my good-quality blue cheese, but I actually think this stuff works really well in this recipe. It's got a really strong salty kick that the marsala modifies nicely. Incidentally, I always thought marsala was kind of expensive so avoided buying a bottle for the house. I was a bit surprised to notice that all the different brands of marsala in the bottle shop were under $10!!! Hopefully not an indication of quality....
All you do is chop up your wedge of cheese (Nigella gave quantities and didn't use walnuts but I did everything to my taste and texture), and mash it up some cream and add your flavourings - fresh nutmeg, walnuts & marsala. I then topped it off with a quartered seedless grape. Nigella suggests flat-leaf parsley and notes that the grape option could tend towards cheesy 60s dinner-party tackiness (cheese and pineapple on sticks!). However, I didn't have parsley, and I quite liked the idea of cheesy 60s dinner-party tackiness! Plus the combination of sweet grape and strong blue cheese mixture works perfectly. This is definitely high on my 'will-make-again' list. The mixture of flavour and texture is highly addictive and I found it very difficult not to scarf the whole lot down before I even made it to my friend's house. Once there, her husband and I found it difficult not to completely fill up on this stuff, and the offcuts of some brownies we were having for dessert. Mmm...blue cheese and chocolate brownies. What a combination. Read on for the recipe:
Blue cheese, walnut & marsala spread
Wedge of blue cheese ~100-150g (cheap is fine, but it must be strong and salty)
Few tablespoons cream or mascarpone
A good grating of fresh nutmeg
A handful of roughly chopped walnuts
2-4 tablespoons marsala (to taste)
Cracker pepper
Flat leaf parsley or seedless grapes (to serve)
Chop the blue cheese and place in an electric mixer. Roughly mix and add the cream to create a smooth, yet thick consistency. Add the walnuts, nutmeg, marsala & pepper until you reach the taste and consistency you like. Store for at least an hour in the fridge for the flavours to meld. Allow to come to room temperature before spreading onto crostini or crackers. Top with chopped parsley or a quartered grape for true cheesy 60s presentation.
Tagged with food & drink
Continue reading
 .
.


