.comment-link {margin-left:.6em;}

Esurientes - The Comfort Zone

Wednesday, June 29, 2005

Rack of Lamb

And a fantastic recipe for a marinating paste!


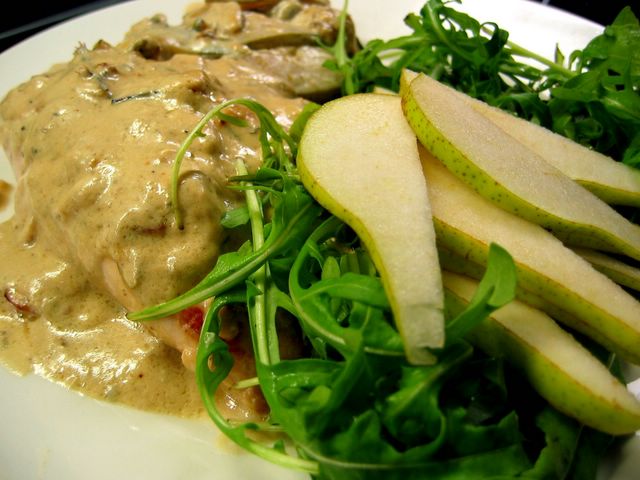
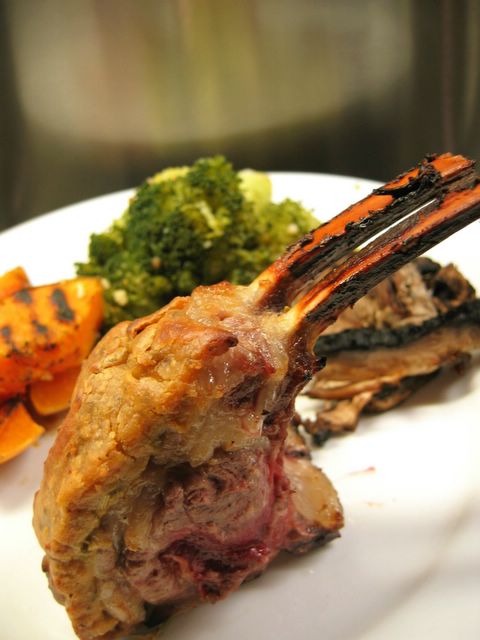
Another roast lamb dish for this meat-hungry Australian. This time a small rack of lamb coated with a delicious mustardy, herby marinating paste courtesy of Stephanie Alexander, roasted until tender and juicy within, and crispy and crunchy without.
I found Stephanie's cooking times for an individual lamb rack portion to be way off, though. She recommended 15 minutes at 220C for a portion of 4 cutlets, and 20 minutes for a double rack (8 cutlets). However, after 20 minutes in my hot oven my 3 cutlet portion was still blue. Totally raw - not a cooked part anywhere! It took another 20 minutes, and my meat was still a little too rare for my liking; and I'm a girl who loves my meat rare! Hmmm.

But if her timings were off, her lamb marinade recipe was a winner. This is a really quick and easy recipe that would be very effective to dress up an otherwise plain piece of lamb. It's savoury, salty and silky smooth; and just thick enough to form a perfect crust on the lamb as it cooks. Highly recommended!
Read on for the recipe:


Marinating Paste for Lamb
This paste is sufficient for marinating a leg of lamb, a whole loin or 8 thick chops.

3 tablespoons Dijon mustard
1 tablespoon light soy sauce
1 tablespoon plain flour
1 tablespoon olive oil
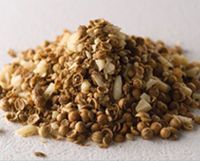
1 teaspoon finely chopped fresh rosemary
freshly ground black pepper

Mix all ingredients together and smear liberally over meat. Roast or grill as usual (if grilling, allow surface to sear and seal well before attempting to turn it). The paste will cook to a dark crust.


Continue reading

Monday, June 27, 2005

Garlic Mushie


This idea is from Nigel Slater, who in turn, got it from Nigella. It's a great idea! Get a large field mushroom and crush a clove of garlic over the top. Add a few chunks or slices of butter, some fresh parsley and salt & pepper, and place in a hot (220C) degree oven for about 20 minutes, until the mushroom has become soft and gooily blackened.
This is perfect as a vegetarian version of a steak sandwich, and some bread dipped in the garlic butter in the pan is incredible. It's also really good as an accompanying vegetable to some steak or other meat. I had it as part of a vegetarian dinner, with some leftover cauliflower cheese. It was so good I repeated a few nights later with some steak. It's easy hand-free cooking. Put it in, while you concentrate on doing something else, and reap the benefits later. Yum!


Continue reading

Friday, June 24, 2005

IMBB: Son-in-law eggs

Also known as 'the only time I will ever deep fry a boiled egg'!!!


So, a theme of eggs hosted by Viv... It should have been easy, you know. Eggs are my favourite quick meal and I love them any way. But I was stuck, at a sad loss. So, I flicked through my beloved Stephanie Alexander Cook's Companion; the complete book of ingredients and recipes for the Australian kitchen, which has a chapter devoted to nearly any ingredient you can think of. And I saw a Thai recipe for son-in-law eggs. A glance through showed it to be interesting...a bit different, unusual...and that I had all the ingredients already. Well, except eggs.
I don't know why they're called son-in-law eggs, and there doesn't seem to be a definitive explanation I can find. Apparently they're a hangover cure in Thailand, and, well, they'd have to be. I mean, they're deep fried boiled eggs!!!! With dipping sauce! Yes, that's right ; DEEP FRIED BOILED EGGS! Healthy cooking be damned with you! I'm going to deep fry me an egg! It sounds so wrong, doesn't it? Like something you'd buy in a Scottish fish & chip shop along with your deep fried pizza and Mars Bar. But, we already have a fancy-pants German deep fryer built into our workbench, so why not make good use of it?
And you know what? Deep frying eggs makes them look just like those Japanese tofu pockets, all pockmarked and lumpy. Kewl!
Making these is very simple. You put your eggs on to boil and make up the dipping sauce. Then you deep fry your eggs (I'm taking too much pleasure in writing this, aren't I?) and go for it.
I have to say, I was a little disappointed in the dipping sauce. Mine came out far too sweet. I know Stephanie writes 'adjust to suit your taste', but it's difficult to alter something that's so sweet and lime-y. I could just imagine A. coming in after a long day of work and Handel arias and me announcing in happy-housewife voice
"I've made something very special for dinner, dear!"
"Oh yes, what's that?"
"Deep fried boiled eggs in syrup!"
"Ummmmmm...........Do I have to?"
Yeah, not so good really. But Thai food is all about the balance between sweet, salty and sour, so I resorted to adding more fish sauce and some soy sauce to increase the salt. Still not so great. So, then the juice of a lemon for more sourness. That kind of worked. Still, the original sauce recipe made a huge amount; there was enough for 20 eggs there, so adding more liquid just meant that I ended up with enough dipping sauce to cater for a barn full of chooks. Maybe I can marinate some fish with it.
The eggs are quartered, and scattered with fresh coriander and fresh chili - but I couldn't find our fresh chilis. Nor our chili flakes, so I had to resort to powdered chili, which has some mighty huge kick to it! It was also recommended to serve this with fried garlic, so I threw a few cloves in the deep fryer. Deep fried garlic is yummy!

So, after rectifying my sauce, how was this? Well, despite still not falling totally in love with my still unbalanced sauce, it was still tasty, and I found myself on my 7th egg quarter before realising I had left very little for anyone else. It was actually quite moreish, and would be an interesting appetiser or cocktail party titbit. If you've already got your deep fryer going for crispy little cocktail delights, it wouldn't be so hard to chuck in a few boiled eggs, while you whip up a very easy dipping sauce. And, well, they're definitely a talking point!
Read on for the recipe:


Son-in-law eggs
Stephanie Alexander - The Cook's Companion

Walnut-sized piece of tamarind pulp
1/2 cup hot water
125g palm sugar (to me this was far too much)
3 tablespoons fish sauce
Juice of 1 lime
Vegetable oil for deep frying
4 hardboiled eggs, peeled
1 tablespoon fried sliced garlic (or a few whole cloves)
fresh coriander leaves
fresh chili

Soak tamarind in water for 30 minutes. Mix well, then squeeze and press through a strainer into a bowl. Combine palm sugar, fish sauce and 1 tablespoon tamarind water in a saucepan and simmer, stirring, until sugar has dissolved. Stir in lime juice and taste for a good balance of sweet, salty and sour. Adjust to suit your taste.
Heat a good quantity of oil and deep-fry eggs until golden brown, about 5 minutes.
Drain, cut eggs into quarters, dip into sauce and eat as an appetiser with fried garlic, coriander and sliced chili as accompaniments.


Continue reading

Thursday, June 23, 2005

Nothing Beats A Brownie

Some potentially very good Brownie recipes in this article (free registration required) from The Age Epicure section, on the search for the perfect Brownie. I'm thinking I definitely need to make at least two of these recipes, purely for research purposes you know!


Continue reading

Honigkoek / Ontbijtkoek


UPDATE - A good recipe found in this later post!

That's Dutch for honey cake or breakfast cake, respectively. It's a traditional Germanic bread/cake that is usually sliced and spread with butter, or cheese. I like it toasted. It has a wonderful taste of honey and lots of spices to make it taste almost Christmassy - usually cinnamon, cardamom and ground cloves (I've decided it's ground cloves which makes anything taste like Christmas). Not too sweet, but almost slightly bitter and caramelly.
Usually we buy loaves of this, and it's tall and very soft; perfect in the toaster and a really tasty breakfast or quick dessert.

I've tried making it a few times from a recipe in our 1963 "Encyclopaedia of European Cooking", which is a masterpiece of dubious research. It's a recipe that doesn't include any eggs, and very little butter, and quite a lot of milk. But, it just doesn't work. The flavour is fine - spicier and stronger than the store-bought ones, but the texture is just like a brick. It simply doesn't rise and sits like lead in your stomach, despite the fairly large amount of baking powder called for.
I tried grilling slices of this to see if that lightened the texture a little (works with bread), but the stuff didn't even grill. It just sat there under the heat and sulked! In the end I threw it in the bin. Very disappointed.
I don't know if this is a case like my hot cross buns; when something is cheap and good quality to buy, perhaps you shouldn't bother trying to make your own? But I'd like to give this one more try. The store-bought ones often list rye flour in their ingredients. Is that something I should use? Would that make it soft and light?
So, does anyone have a good recipe to make this Dutch/German/Flemish breakfast cake? Something from their family archives, or something they know to work. Anything would be better than that recipe I have!


Continue reading

Wednesday, June 22, 2005

Roast Lamb with all the trimmings


This is the quintessential Aussie family meal. I don't think there are many Aussies who don't have childhood memories of sitting down to a lamb roast - even those with migrant families; my dad, for example, loved it. In fact, there was an amusing ad a few years ago showing a young Asian girl sitting down with her schoolfriend's Aussie family to have a roast.
"So, do they have this where you're from?" says the dad, carving up the lamb
"Bendigo?" says the girl.
Ok, so that's not quite how the ad went, but it was along those lines. There's an even more famous ad from my primary school years about a girl winning a competition to have dinner with Tom Cruise, and knocking it back because "mum's cooking a lamb roast". Yes, I'd go for the roast too, especially if Tom Cruise were the other option!
There are a million and one methods for cooking roast lamb, but I turned to Stephanie Alexander. I liked her method of cooking the lamb on an oven rack suspended above a roasting pan. She recommends cooking at a high temperature (210C), which can cause the fat to spatter, so the pan underneath, filled with a little liquid stops the spattering, and the juices that drip in creates the beginning of your gravy.
The lamb was pink and juicy near the bone (my preference) and a little more cooked toward the outside (A & my mum's choice). It studded with garlic and rosemary, which flavoured the gravy. In fact, that was the first gravy I've made from scratch. I've grown up a Gravox girl, and I'm still quite proud to say that I still do love that thick, dark, salty stuff, But this was a real gravy, made with real elbow grease, and mighty fine it was too!
We had roast potatoes, roast pumpkin, green peas and cauliflower cheese with this; how more traditional can you get? And we even had it on a worknight! Surprisingly it didn't take that long, and we were eating by 8.30.


Continue reading

Tuesday, June 21, 2005

Almost rhubarb crumble


There are a lot of rhubarb recipes on other foodblog sites at the moment, all from the northern hemisphere, which surprised me as I've always thought of rhubarb as a winter thing. My mum would make stewed apple and rhubarb on cold winter days, and rhubarb crumble is definitely an Australian winter dish.
I was thinking of making a rhubarb tart for the last SHF, but confused myself so about when I could get it here. Cookbooks from the UK and USA often mention how briefly rhubarb is in season. So I turned to Stephanie Alexander's 'Cook's Companion' as I always do when looking for information on an ingredient and discovered that Australia doesn't have a rhubarb season; it is available all year-round! Moreover Australian rhubarb is always pink, tender and non-stringy. Fantastic news!
So, this stewed rhubarb is the product of using up the bunch sitting in the fridge that wasn't used for my tart. I had imagined I'd need to place the rhubarb in the oven and bake it for a long time, but Stephanie recommended her much quicker method to make a puree.
All you do it chop it into 3cm slices, place in a heavy pot with a lid, strew with a generous sprinkling of sugar (I used 100g) and a few spoonfuls of water. So much liquid comes out of rhubarb that extra liquid is unnecessary. Cover and cook it at a medium-high heat for about 5-7 minutes, and give it a stir to mix. It should be nearly ready. Cook for a few more minutes, and the puree will be done.
To my rhubarb I added a few bruised cardamom pods and some rosewater, which gave it a more exotic flavour. I also added a little lemon juice at the end, because I don't like things too sweet.
Rhubarb puree - perfect in a crumble, but also pretty darn good with some yoghurt and a handful of home-made granola.


Continue reading

Monday, June 20, 2005

Did they not eat?


A quiet Saturday afternoon browsing the shelves in Books For Cooks and wishing Ladro were serving for some of their fabulous woodfired pizza with bitter radicchio.
I had definite plans NOT to buy a Nigella book, as a service to my readers. I feel I would like to branch out to include other authors, but her writing just speaks to me so. I very nearly bought another Nigel Slater, but after noticing how he devotes entire chapters to 'Potatoes' 'Pasta & Rice' and 'Sausages' in Real Food, all of which I'm trying to eat in moderation at the moment, I decided to wait a few months. It'd be the perfect book for A. though. He would happily live on those 4 items.
Anyway, it was the book above that jumped out at me. What I love about the Melbourne Books for Cooks is that they include second-hand books on their shelves. And of the two copies of Nigella's How To Eat, one was second-hand and only $35! It doesn't look like it's been used at all. Perhaps even opened only once or twice. Considering a new paperback of it costs about $60, this was too good to miss!
I had always thought I didn't need How To Eat. A quick glance at it made me think it was a type of encyclopaedia like my Stephanie Alexander Cook's Companion. But I was wrong. It's not, and I'm really enoying reading it. She's just so down-to-earth and makes so much damn sense, particularly in the low-fat/losing weight chapter. I think more people with misconceived ideas about how to lose weight should read her first few pages of that chapter.
But, what is most interesting about this copy is the handwritten dedication in the flyleaf. I wonder who Karen and Nick are? The inscription seems to indicate the book was an engagement or moving-in-together present. I wonder what happened that this book ended up no longer in their house. A. came to the conclusion that they broke up. In acrimonious circumstances. I rather prefer the idea that they just didn't appreciate cooking and realised they could make a few bucks selling it. Who knows? I secretly think A. might be on the right track, but that's rather a depressing thought. Well, at least Rick, Melis and Henry can be reassured that it has ended up in the hands of somebody who definitely agrees with their sentiment that food and nurturing are important parts of any relationship, and truly appreciates the book they chose.


Continue reading

Food Processor Danish Pastry


Ok, so whoa!, not the most pretty photograph there. But that's my half batch (plus a bit) of Danish pastry made in the food processor, in its frozen state. This is what I used for the base (lid?) of my tarte tatin in the previous post, as suggested in Nigella's Domestic Goddess. In a previous life, not that long ago, I would never have considered making my own pastry, let alone pastry that used yeast in it....or a Danish pastry! See how I've grown! My second foray into yeast cookery, and I'm intact. Granted, there was no kneading or proofing involved in this recipe, but baby steps, ok. Baby steps.
This was the best pastry I've ever tasted, in its raw state. I know there's just something so wrong about plucking off blobs of raw pastry pebbled with chunks of cold butter, but man that yeasty, slightly sweet flavour was good.
And a word on butter content. This recipe uses a whole block (250g in Australia), which yes, is a lot. However, most recipes require a half batch - so 125g butter. Now, most of those recipes make something that creates about 8 slices or 6 portions, so your butter content in your portioned bit of pastry is about 15 to 20 grams.That's about a tablespoon. Not so much, is it? Most people would have about that on 2 pieces of toast. So, rather than having conniptions about the butter involved in this pastry, just forego your morning toast or lunchtime sandwich with butter. And enjoy something truly delicious. Pastry made with real butter has to be better for your than the spooky stuff they put in commercial and frozen pastry. For more interesting info on how butter can be good for your health, check out this great post on Cooking For Engineers (scroll down)
I couldn't quite tell if this was really superlative pastry in my tarte tatin, as the flavour of the apples and caramel was so strong, but I plan to use this half batch to make some almond danishes for my mum's birthday in a few weeks, so I'll get back to you on that. It was definitely better than my usual sheet of frozen puff pastry, though!
Read on for the recipe:


Food Processor Danish Pastry
60ml warm water
125ml milk, at room temperature
1 large egg, at room temperature
250g white bread flour
7g (1 sachet) dried yeast
1 teaspoon salt
25g caster sugar
250g unsalted butter, cold, cut into chunks
Pour the water and milk into a measuring jug and add the egg, beating with a fork to mix. Put aside. Put flour, yeast, salt and sugar in a food processor and give a quick whizz, just to mix. Add the cold slices of butter and process briefly so that the butter is cut up a little, though you still want visitble chunks of at least 1cm. Empty the contents of the food processor into a large bowl and quickly add the contents of the jug. Fold the ingredients together, but don't overdo it; expect to have a gooey mess with some butter lumps pebbled through it. Cover the bowl with plastic wrap, put in the frige and leave overnight or a few days.
To turn it into pastry, take it out of the fridge, let it get to room temperature and roll it out to a 50x50cm square. Fold the dough square into thirds, like a business letter, turning it afterwards so that the closed fold is on your left, like the spine of a book. Roll out again to a 50cm square, repeating the steps above 3 times. Cut in half, wrap both pieces and store in the fridge for 30 minutes before using, or the freezer to store.


Continue reading

Saturday, June 18, 2005

SHF: Tarte Tatin of 1001 Arabian Nights


This month's Sugar High Friday, with the theme of tarts filled me with possibilities. I had all but decided to make a rhubarb tart when we found ourselves at a winery and cidery just outside Bendigo over the long weekend (Bress Winery & Cidery, Harcourt. Website not yet launched). After buying some excellent cider, which tasted like champagne with an appley aftertaste, the winemaker (cideron?) pointed us to a big crate of aples from the orchard and told us to help ourselves. 'Make a tart!' he suggested.
'Ah ha!' we thought. Not only do we have free ingredients for our SHF tart, but we have ingredients with a story! Why the Arabian Nights? We decided to go with a Middle-Eastern feel for this standard recipe.
So, we collected about 1.5 kilos of Pink Lady apples, small enough to fit in your hand; unwaxed and full of real apple flavour. Not too sweet, but not too sour either, as it is the end of the apple season down here. These weren't cider apples though; apparently nobody could eat one of those; "far too bitter!' we were told.
We managed to hold off eating the whole lot, and saved enough for the tart. A few days earlier I decided to make the Processor Danish Pastry in Nigella's Domestic Goddess - post to come, but it was really easy, and I plan to make Almond Danishes with it soon - which I used as my base.
I started making this tart at 10.30 Friday night, after we'd come home from a long Bach Cantata rehearsal after a long day at work. Apart from the tedious peeling of the apples (my most HATED kitchen chore. Being left-handed poses so many problems sometimes!), this was really easy to do. We were eating tart by 11.30 while watching The Sound of Music, for the thousandth time, on tv.
As I have a few Middle-Eastern ingredients in the pantry at the moment, I decided to jazz up this standard tart a little, to make it stand out amongst the thousands of SHF entries. Plain Tarte Tatin - meh. But Tarte Tatin with some pomegranate molasses cooked with the apples, and splashed with orange blossom water and rosewater then sprinkled with chopped pistachios - now, that makes it more interesting!
Interestingly, I couldn't taste the rose or orange blossom water when it was cooked. The pomegranate came through, and made me think I should have reduced the sugar a litte; I found it a bit too sweet. I've reduced the amount in the recipe below. But I just had some cold for lunch, and I much preferred it today, at room temperature, when it tasted not so sweet. A. loved it last night, however, and thought it tasted 'just like stewed apples on pastry. Yummy!'.
Tasty and very easy. And if you can get somebody else to peel the apples, even better!
Read on for the recipe:


Tarte Tatin of 1001 Arabian Nights
Adapted from Nigella's Tarte Tatin in Domestic Goddess.

100 g butter
100g caster sugar
1kg apples, peeled, quartered and cored
2 tbl pomegranate molasses
1 tbl orange-blossom water
1tbl rosewater
Handful chopped pistachios
half-measure Danish pastry, rolled out and ready to use (or use frozen puff pastry or whatever you have)

Preheat the oven to 200C and put in a baking sheet.
Put the butter in the a cast-iron frying pan and heat. Let the butter melt and add the sugar. When it foams, add the prepared apples, arranging them in a circular pattern (as best you can), hump side down. Add the pomegranate molasses. Cook on high heat until the buttery, sugary juices turn a caramel colour and the fruit has softened a little. Now splash in your orange blossom and rosewater and chopped pistachios.
Take the pan off the heat, and leave it to stand for 10 minutes.
Roll the pastry thinly into a circle to fit the top of the dish, plus a bit of overhang. Lay it on top of the apples in the dish, tucking the edges in. Transfer the dish to the baking sheet in the oven and cook for 15-25 minutes, until the pastry is golden and the caramel syrup is bubbling.
Take the cooked tart out of the oven, place a large plate on top of the dish and, wearing oven gloves and with great care!, turn the whole thing upside down. Remove the dish and you should be presented with your tarte tatin, Patch together any dodgy looking bits, and serve with yoghurt or creme fraiche. Or cream!
Serves 6.


Continue reading

Thursday, June 16, 2005

Best Meat Pies in Melbourne


Whoa - that's a big call, isn't it? In a city of meat-pie lovers and with a culture of a Four&Twenty with sauce at the footy in winter. But I really think we've found the top one.
A few months ago I was meeting A. for lunch. I'm working up at the posh or 'Paris End' of the city, surrounded by Hermes, Georg Jensen, Armani etc stores. And politicians. A. works as far down the other end as you can get, in the financial area. Up at my end I pay $7 for a sandwich (if I choose to do so. Not often!). Down the other end with the finance and construction workers, not so much!
So, I trekked down with no real idea of what we'd have for lunch. I passed a non-descript cafe and noticed a sign saying 'Home-made hamburgers $5'. When I met up with him he said he'd love a big hamburger for lunch....'well, what do you know?' said I.
We went in, and they really were fantastic hamburgers. A. started visiting most lunchtimes and chatting with the owner. He discovered the owner came from Italy to Adelaide in the 70s to do a Masters in Economics, before opening up his own French and Italian restaurants in Melbourne. How he came to start running a small cafe for city lunch workers in the less-salubrious part of the city I don't know. But A. soon realised his customers were being treated to some damn fine food. Homemade cakes and slices, proper lasagnes and.....quite possibly the best pies he's ever tasted.
Robert, the owner, realised A. was enthusiastic about his food and started offering samples and new creations for him to taste and give his opinion. After a few weeks of hearing about how brilliant these pies were, I requested a sample. Robert gave me 3. :-)
The most notable thing about these pies is that they're obviously homemade. Robert makes his own pastry, which is flaky and buttery. His fillings change every day. A's favourite is the chicken pie, which can vary from chicken & corn one day to something like chicken, onion and fresh herbs the next.
I received a chicken, onion & herb pie, a beef pie with a hint of curry and a fat sausage roll. These are not pies to be destroyed by squodge of tomato sauce. Tomtato sauce doesn't belong on pies anyway (sorry! - I know that's inviting criticism, but who would ruin a savoury pie with a glob of too-sweet red sauce? Yuck.). I heated them up in the oven at home, with the intention of sampling just a bit of each. 10 minutes later I realised I'd eaten both the pies, and most of the sausage roll. Oops! *blush*.
Yes - these are top pies. I totally agree with A. I also preferred the chicken pie, with its obvious French influence, but wouldn't turn the beef pie from my lips with any argument. I didn't like the sausage roll so much, as it was a bit too obviously bulked out with bread. Tomato sauce would work with that one! :-)
Check out this gorgeous chicken pie creation, and tell me you wouldn't kill for one of these?

If you work around King, La Trobe or surrounding streets and are looking for someplace with food that's both cheap and really good quality, we reckon you should pay Robert a visit.
It's a pretty non-descript cafe, without much attraction to passers-by, but he's obviously passionate about his food and building up his customers. And if you show enough passion about your food too, you may also end up as a sampling guinea pig for him! Also, he tells us he does catering as well, so if your business is down that end of the city, and needs boardroom meals, we'd recommend this place.

Order the pies. :-)

Chatterbox Cafe
318 King Street
Melbourne 3000
03 9670 3566.
Pies $3. Hot food $5. 'Best value lasagne in town' says A.


Continue reading

Wednesday, June 15, 2005

Update on dukkah

dukkah
A few people have asked questions about the dukkah I mentioned in the previous post. It's become a fairly popular seasoning in Australia, with the current appreciation for Middle-Eastern food.
I didn't make the dukkah myself; it was bought at a produce market in the Yarra Valley, but it's not too hard to find. We also have a tin of it, made by Peter Watson spices, which I've seen sold in lots of places. It seems to be made by quite a few companies. Herbie's Spices in Sydney also make one themselves.
Here's some information I found on a website:
Dukkah is a delicious combination of Middle Eastern spices and flavours: Hazelnuts or chickpeas as a base, along with pepper, coriander, cumin and sesame seeds.Dukkah has a long tradition in the Middle East and has been enjoyed by many of it's cultures. After a tiring day travelling with camel, Arabs would gather around a small fire roasting spices, nuts and seeds, and finally crushing them into a coarse powder. They would then take hunks of bread, dipping them first into olive oil, and then into the Dukkah to satisfy their hunger.Today Dukkah may be enjoyed from Egyptian street vendors. A small paper cone is filled with Dukkah and given to the customer along with strips of pita bread, which are dipped into the vendors bowl of olive oil and then into the Dukkah in the traditional way. Each vendor has a unique Dukkah recipe and is fiercely proud of his combination of traditional and regional flavours.Of course Dukkah need not only be enjoyed in the traditional way. It is a very versatile seasoning and works equally as well sprinkled on salads or vegetables, mixed with honey as a sweet sandwich spread, as a crust for roasted chicken, lamb, or fish, or even mixed into bread dough before baking.

It also sounds quite easy to make yourself, and a search on Google brings up lots of recipes. Here's a few.
I'm most used to having it served in a bowl alongside a bowl of good olive oil. We take Turkish bread and dip it in the oil, then the dukkah. It gets a bit messy, but it's tasty. I've also watched a Middle-Eastern friend use the oil and dukkah as a topping for a type of simple flat-bread pizza dish, with some fresh coriander.
Of course, those who have read my blog for a while know about my aversion to the flavour of cumin, so I can't claim to be a huge fan of dukkah, despite hazelnuts being my favourite nuts. But I'm getting there.....


Continue reading

Tuesday, June 14, 2005

Multiculturalism on a plate


Red wine & lentil & vegetable stew with thyme and basil accompanied by flathead fillets coated in dukkah - a north African paste of nuts and seeds (sesame, coriander, cumin seeds & hazelnuts). Yes, I know the combination doesn't technically complement each other, but what can I say? I live in a multicultural society. :-)
Modern Australia on a plate!


Continue reading

Friday, June 10, 2005

The Cookbook Meme


Nic nominated me for this a few weeks back. Sorry it's taken so long!

1: The rationale behind what we're seeing
These are a set of shelves in our walk-in pantry, just off the kitchen. What you must understand is that my mum has a war aginst clutter. Our house is very minimalist and modern, always looking ready for a photo shoot (for which it has been used on occasion), so the need for a walk-in pantry to store groceries and clutter is imperative for the kitchen to look like nobody uses it (sorry mum!). That said, it's a fabulous kitchen in which to cook, and I find myself embattled in the same war against clutter when on holiday in rental houses! Must be genetic, because I'm really messy everywhere else.

We don't have very many cookbooks, partly because mum had a cleanout a few years back and only kept the worthy and historically valued ones. Since then I've been buiding up my own small, but growing collection, but I also get a lot of inspiration from the internet and other food bloggers.
My books are mostly on the bottom shelf, within easy reach. I have my Nigellas, Jill Dupleixs, Stephanie Alexanders etc. and 3 very special books of personal notes and torn-out recipes; 2 by me and 1 treasured one by my great-grandmother, which is nearly falling to pieces, but full of the most useful pre-war baking recipes and little descriptive comments. You also see my baking ingredients, kept within easy reach. :-)
The middle shelf contains my books which are too tall for the bottom shelf, and our large collection of Australian Women's Weekly cookbooks, which are so useful to Aussie cooks. Everything ranging from 'Chocolate' to 'Potatoes' to 'Indian' to 'Beginners' (for my brother when he was living in Canada). And the Enclyclopaedia of European Cooking; a masterpiece of dubious semi-research from the 1960s, but good for German cake recipes. You can also see my funky red Italian scales A. bought me last year.
The top shelf is full of things that we can't get to unless we *really* need to refer to useless books like the 1970s Carribean Islands Cookery Encyclopaedia (!), my 1987 Brownie Guide cookbook or the 1966 Kingsbury High School Parents' Association cookbook (great biscuit recipes in that).
2: Most recommended
Easy. Stephanie Alexander's The Cook's Companion : the complete book of ingredients and recipes for the Australian kitchen, (Amazon link) found in 1 in every 3 Australian kitchens. This weighty encyclopaedic book is known many Aussies as "The Orange Bible". It weighs a ton, and doesn't have any photos, but has been the most popular cookbook in Australia. It's divided into chapters according to ingredients. Have bananas but don't know what to do with them? Go to her chapter on bananas and she'll tell you about the different varieties, how to store them, what flavours they complement and a list of excellent recipes. A wonderful resource, and the first such book aimed exclusively toward Australian seasons and ingredients. Interesting enough to read in bed as entertainment, but too heavy to do so without sore arms.
3: Cookbook that made you what you are?
Nigella's How to be a Domestic Goddess. That's when I became truly interested in baking and cooking (not that I wasn't before. My family will attest to that!).
4: Porniest Cookbook?
Errr. Can't say I get terribly hot under the collar about them, but possibly Jill Dupleix's books. Really excellent photography, that she takes herself. Damn multitalented Australian expats.
5: Sophie's Choice Cookbook?
My Stephanie Alexander Orange Bible. Given to me by my a good friend for my 21st birthday. I've heard stories of people moving to Europe and leaving behind all sorts of basic essentials so they can take Stephanie with them.
6: If you were a cookbook, which cookbook would you be?
I'd like to say something worthy and erudite like Joel Robuchon or Thomas Keller's books, but the secret reality is more like 'Cooking with the Two Fat Ladies'. More butter and streaky bacon, please!! :-)
7: If your cookbooks were extremely valuable, so valuable you might hide it with other valuables, where would you hide it?
Quite possibly inside my friend Vaughan's oven. He hasn't switched it on since he moved in 6 years ago.
Passing this on:
I'd like to nominate another Australian/Kiwi blogger from my list on the right. Any takers? I'd love to see books I know on other peoples' shelves.
Also, I'm nominating my own boyfriend A. He's taken an interest in this post, and sent a few emails about his own cookbooks, so he shall be interviewed fairly soon for what's in his collection. Special Guest Artist and all that... :-)

And now, I'm off to Woodend and Bendigo, for the Queen's Birthday long weekend, to perform in a festival and attend competitions. It should be pretty cold up there. I'll be back in a few days.


Continue reading

Wednesday, June 08, 2005

Blue Cheese & Pear


The combination of blue cheese and fresh pear works so well, doesn't it? The strong, salty, musty taste of the cheese against the bright, sweet coolness of a pear. Yum.
I made a blue cheese sauce for a chicken breast a few weeks ago with a big chunk of left over King Island Endeavour Blue from a party. Mixed with a little sour cream (for want of real cream) and a half teaspoon of Vegeta powdered vegetable stock (made in Malta, I think, and popular with Southern European migrants here) and some red wine. Spooned over a chicken breast and steamed zucchini, then teamed with a sliced perfectly ripe Autumn pear and a tangle of peppery rocket leaves. Yum and yum! What topped it all off was the drizzle of balsamic vinegar over the pear, which I did after taking the photo. What a great dinner idea!! Pity we so rarely have leftover blue cheese in our fridge....I love the stuff.


Continue reading

Tuesday, June 07, 2005

Pomegranate & Berry Cakes


These are the other baked goodies I took to our church market stall, and these went like...well, hot cakes. :-) They're a very simple recipe, that is very effective. I don't know if it was a baking mishap on my part, but the batter was very liquidy and didn't rise at all. That worried me a little, but the compensation was that the crust became gorgeously crunchy and sticky and golden. The cake underneath was very light and the combination of the two was excellent. What really made these cakes though, was the pomegranate molasses I brushed over the top of each cake. I know pomegranate molasses is the big old foodie ingredient at the moment...and it's seriously good! My mum bought it for me at the local market, not knowing it was the fashionable ingredient of the mid 2000s, and was surprised when I became so excited about it.
All it contains is reduced pomegranates - no sugar or additives, and it's seriously sweet, but also very tangy and almost sour. It's an amazing combination - more interesting than lemon, but with the same sort of tang. And our bottle cost only $1.80! [edit: We were wrong. It cost $2.40. Shocking!] It gave these little cakes an amazing flavour and a great glossy sheen.
These were more popular than the peanut butter chocolate muffins I made, partly because of the name; anything with pomegranate in the title just sounds so very exotic, doesn't it?
Read on for the recipe:


Pomegranate & Berry Cakes

60g butter
200g plain flour
2 teaspoons baking powder
1/2 teaspoon bicarbonate of soda
150g caster sugar
1/4 teaspoon salt
juice and zest of 1 lemon
3 teaspoons pomegranate molasses
approx 120ml milk
1 egg
150g mixed berries (from frozen is fine)
For syrup:
2-3 tablespoons pomegranate molasses

Preheat oven to 200C.
Melt the butter and set it aside to cool. Stir together the flour, baking powder, bicarb, sugar, salt and zest. In a measuring jug, pour in the lemon juice, then enough milk to come to the 200ml mark. It will curdle, but that's ok. Then beat in the egg, molasses and melted butter. Pour into the dry ingredients and stir briefly; the batter should scarcely be combined. Fold in the berries, spoon the mixture into the muffin cases and bake for about 25 minutes. Leave in pan for 5 minutes to cool slightly, then remove to a rack. Whilst still warm, brush with the pomegranate molasses.

Note - I found the cakes stuck fairly stubbornly to the paper cases, so next time I would spray some cooking spray in them before filling.
Makes 12.


Continue reading

Monday, June 06, 2005

Peanut Butter Chocolate Muffins


Making these was part of a late Saturday night, at-home, slightly-bored, but not-energetic-enough-to-go-out-and-do-anything entertainment for me, while watching TV. Every month the church where I sing has a market stall, for which they encourage us to bring along goods to sell. I'm already bringing some of my plum jams I made in the summer, but chose to make a few extra goodies to raise some much-needed funds.
Because it was late and I was too lazy to go out, I relied on things already in the pantry. Namely two jars of nearly finished peanut butter and chocolate peanut butter (fabulous stuff!). I had choc chips, so decided to do a little peanut butter choc chip muffin creation. And I think it worked extremely well. They weren't as popular as the other little cakes I made (post later), but those who love peanut butter, and fairly dense, cakey muffins enjoyed these. I even heard one old lady describe them as "scrumptious"!
Read on for the recipe:


Peanut Butter Chocolate Muffins
Based on Nigella's Snickers and Peanut Butter Muffins

250g flour
85g sugar
1 1/2 tbls baking powder
pinch salt
~1/4 - 1/3 cup peanut butter
60g butter, melted
1 egg
175ml milk
150g chocolate chips

Preheat oven to 200C.
Stir together flour, sugar, baking powder and salt. Add the peanut butter and mix until you have a bowl of coarse crumbs. Add the melted butter and egg to the milk, then stir this gently into the bowl. Mix in the choc chips and spoon into muffin cases.
Cook for 20-25 minutes. Tops should be golden and firm. Cool for 5-10 minutes.
Makes 12.


Continue reading

Saturday, June 04, 2005

Chocolate Coffee Fudge Cake


I got a commission! Yes, a full-on paid request for my cake baking work! Two friends of mine had a joint birthday party and asked if I could make the cake. Instead of buying something mundane from a cake shop they preferred a personal touch, and have evidently noticed how much I love baking.
I deliberated for a while over what to do. Basically it came down to something chocolate and gooey. Because, come on, we're talking a party of mainly women here. Chocolate and lots of it is what they want. I decided on the combination of chocolate and coffee because when one of the friends is out for coffee with us, I notice she always orders a mocha. So, a mocha cake for my mocha-loving friend (the other one likes anything. She was easy.)
But I couldn't decide whether I wanted to ice the chocolate cake all around with a dark chocolate fudge icing, and a coffee cream middle, or a chocolate fudge middle and a coffee-flavoured icing around the outside. This dilemma took up more of my attention than you'd expect, and even necessitated serious, survey-type emails to friends. Bascially it came down to this response from A:
"Well, either would work, the big difference would lie in people's reaction:
If it looks like a chocolate cake they will eat it and go: "Ooooh! Nice!"
if it looks like a coffee cake they will ask first and say: "Ooooh! Different! Unusual!" Then eat it and go "oooooh! Niiiice!"

Personally, I wanted to go the coffee coloured outside, but I knew that visuals were everything, and something that was obviously chocolatey would be better. In any case, the coffee/white chocolate icing I tried to make failed miserably and I flushed it down the sink. So, that was that.
I spent some time looking for a really good recipe for the cake and found one on the Baking Sheet site. It included some coffee in the mixture, which I thought would completement the rest of the flavours well. It was a wonderful basic cake; really moist and dark. Thanks Nic!
I sandwiched the two layers with a coffee flavoured cream filling made by creating a coffee essence of instant coffee added to some boiling water mixed in with some whipped cream. Then sprinkled over some walnuts I had caramelised in brown sugar. It was lucky most of them made it onto the cake, because I tell you, homemade caramelised walnuts are pretty darn tasty.

Coffee cream with caramelised walnuts

I then made up the same chocolate fudge buttercream I've used for my two previous chocolate birthday cakes. I also added some strong espresso coffee to the icing, to try and create a mocha flavour. It didn't entirely work, as the most dominant flavour was 'chocolate' and 'sweet'.
I slathered that chocolate goodness over the top of the cake; I actually wasn't able to do all down the sides as there was too much of a gap between the layers so I finely chopped some leftover caramelised walnuts and press them onto the sides, where the cream was showing.

At this stage a friend had popped in to visit and between us we came up with a decorating scheme for the top of the cake. I had bought some great chocolate coffee beans from Haigh's, and a set of beautifully delicate sugar flowers from a baking store, but didn't have much of an idea how I was going to display them. My friend, who does part-time work as a milliner, got creative with the coffee beans, arranging them in snake-like patterns. She insisted that if anybody ask I inform all that all decorating was outsourced!
The picture below shows what it looked like when we had finished, but after that I added a few shiny silver balls to up the elegance stakes a little more.

Yes, everybody loved this cake and made appreciative moaning noises. The party was held in one friend's brand-new house, with no furniture. So we ate this from paper napkins, with our fingers (forks would have been good, but alas no furniture = no cutlery!) sitting on the floor slumped against the wall. Yes, it was rich, but that's what you want with a special-occasion birthday cake, eh?
Also, I have to say, this commission business sounds better than the reality. It took me a looong time to make this cake. I hope the others at the party don't start getting too excited. Once in a while is good, but not every weekend!!
Read on for the recipe:


Chocolate Coffee Fudge Cake

Chocolate Cake
1 3/4 cups plain flour
1 cup white sugar
1 cup brown sugar
3/4 cup unsweetened Dutch-process cocoa powder
2 tsp. baking soda
1 tsp. baking powder
1 tsp. salt
1 1/4 cups buttermilk
2 large eggs, lightly beaten
1/4 cup vegetable oil
1 tsp. pure vanilla extract
1 cup hot strong black coffee
Filling:
300ml whipping cream
2 teaspoons instant coffee
1 tbls boiling water
Caramelised Walnuts
4 tbsp sugar
100 g walnuts (roughly chopped)
Chocolate Fudge Icing
175g dark chocolate
250g unsalted butter, softened
275g icing sugar, sifted
1 tbsp vanilla extract

Preheat oven to 350F.
Whisk together buttermilk, oil, eggs and vanilla. Let the buttermilk mixture come to room temperature. Sift all dry ingredients together in a very large bowl.
Whisk buttermilk mixture into dry ingredients. When combined, carefully whisk in hot coffee.
Pour into greased pans, either 2 9" round cake pans or 1 11x13 pan.
Bake until tester comes out clean, 45-55 minutes depending on the pan (the less batter, the more cooking time).
Note: Do not be fooled by the relative thinness of the batter; it really puffs up as it bakes! Do NOT fill any pans more then 2/3 of the way full!
For the filling: Whip the cream to fairly stiff peaks and make up the coffee extract. Add the extract to the whipped cream and spread over the one cake layer.
For the caramelised walnuts: Heat up a heavy non-stick pan. Pour the sugar in and leave until it liquidises and starts to brown slightly. Turn off the heat and toss the walnuts in the caramel. You will have to work fast as the caramel will continue to cook in the hot pan and you do not want it to burn. Transfer the caramelised nuts to a non-stick baking tray, separate with two forks and leave them to cool. Add to the bottom layer over the coffee cream.
To make the icing, melt the chocolate in the microwave – 2-3 minutes on medium should do it – or in a bowl sitting over a pan of simmering water, and let cool slightly. In another bowl, beat the butter until it's soft and creamy and then add the sieved icing sugar and beat again until everything's light and fluffy. Then gently add the vanilla, hazelnut essence and chocolate and mix together until everything is glossy and smooth. Ice the top and sides of the cake, then apply your decorations.


Continue reading

Thursday, June 02, 2005

Roast Lamb for One


The best lamb you'll taste...

It's now officially winter down here, and getting cold it is too. Getting a cold is also what I've been doing recently, and had the past two days home sick coughing up a lung and feeling generally blah.
It's the time of year when it's dark when you leave the office just after 5pm, and black by the time you get home wanting hearty stews and thick soups, like the lamb shank and barley broth I'm eating as I type this. I, like Nigella, share an affliction to cook entire meals just for myself, so her idea in 'Feast' for Roast Lamb for 1 using a lamb shank was such a brilliant idea I wondered why I hadn't heard of it before.
Concerned about the fat levels in a lamb shank as they taste so gelatinous and gooey when cooked I did some research. Yes, they're not the most lean meat around, but it seems all cuts of lamb are the same. If you're going to cook any meat, you're going to get fat unless you're only using fillet. And actually, my research revealed that the hind shank of a lamb is the leanest cut of lamb you can buy. All well and good if you're buying lamb shanks from the butcher, but the supermarkets sure don't specify if their shanks are fore or hind! Actually, after cooking these shanks I noted each time how little fat was left in the pan; virtually none. The fatty mouthfeel mainly comes from the high levels of gelatine in the bones which virtually baste the meat from the inside as it cooks. What a wonderful and convenient quirk of nature!

I made this meal twice with the two shanks we had, both times differently, and I couldn't say which I preferred. I do know that both times I took my first bite of burstingly bronzed meat I let cry with 'Faaarrrrrrrrrr** that's good!!!!' or something similar.
The idea is simplicity itself, to throw a few bits and pieces and some liquid in a bag and marinate the meat for a few hours. Transfer it all to a small tin, or a cast iron pan (Le Creuset frying pans are the perfect size) and cook it for about an hour. I used Nigella's recipe the first time (below), and my own using tomato paste, red wine and anchovies for the second (above).

I found my liquid boiled dry a couple of times, meaning I had to have an open bottle of red wine near the oven for occasional top ups. Throw a few vegetables in the pan at some stage - potatoes work extremely well, brussels sprouts not so much (if, like me, you don't particularly like brussels sprouts, you're certainly not going to change your opinion by roasting them. Yuck and yuck.) At the end, as the meat is resting, deglaze the pan with some more red wine and make a glorious sticky sauce bursting with flavour. The meat, after its long cooking is tender, sticky and soft and your lips may well stick together.
This is some seriously good food. Just perfect for eating on the couch on a cold night. It'd also work well cooking for 2, but not any more than that. Something about this meal suggests intimate eating...
Read on for the recipe:


Check out those pototoes!

Roast Lamb for One
based on Nigella Lawson, 'Feast'

1 lamb shank
1 sprig rosemary
2 cloves garlic, bruised
juice and zest of 1/2 lemon
2 or more tablespoons port
1/2 cup red wine
1/2 teaspoon olive oil
1 teaspoon Maldon salt (or 1/2 teaspoon table salt)

Put everything into a freezer bag, along with some pepper, tie securely and leave in the fridge to marinate overnight.
Preheat the oven to 200C and take the lamb in its package out of the fridge to come to room temperature.
Put the lamb shank along with the marinade into a roasting tin and cook for 1-1 1/2 hours, depending on the size of the shank. This is the perfect time to retire to the couch with a glass of red wine.
Turn the shank over halfway through cooking. You may need to top up the the small amount of liquid in the bottom of the tin with some more red wine. By the time it's done it should look bursting with bronzedness; let stand for 5-10 minutes beofre eating. While it's resting, put the tin on the stove and stir in a little water and some redcurrant jelly or just red wine to make a light sauce.


Continue reading

Wednesday, June 01, 2005

Store Wars

If you haven't yet, you should check out Grocery StoreWars - devised by the Organic Trade Association. They've created a puppet film version of the original Star Wars using real vegetables and all kinds of bad puns:...Obi Wan Canoli... Tofu D2...Chewbroccoli...the Death Melon...
Really funny stuff, even if you're not a Star Wars fan. Highly recommended!
Thanks to Diary of an Average Australian, the first blog I ever read, for this link.


Continue reading

Granola?


I start with an admission. I have never before tasted granola. If you stopped me in the street for one of those television pop quizzes and offered me $1,000 to describe granola, I'd get as far as 'some type of breakfast cereal?'. To me, granola is something mentioned in Ramona Quimby books from my childhood. Hey, I'm Australian! I bet you don't have Vita Brits in your country! (...yes, and it's beside the point that I HATE Vita Brits. Nasty cardboardy things that go soggy too quickly)
And I guess that's my problem with breakfast cereals. I never grew up eating them because I just didn't like the texture when they went soggy, and they went soggy far too quickly. I didn't like the overwhelming sweetness of the kiddie cereals like Froot Loops, but I also didn't like the bland ones like Cornflakes or Vita Brits. So, while my brother was chowing down on Nutragrain every morning before school (with warm milk in winter, which did nothing but make it go soggy even quicker!) I always had a piece of Vegemite toast.
So, why now am I making my own breakfast cereal? And what's more, why am I making something I've never tasted before?! Well, this is a perfect example of being seduced by a pretty photo.
When I first received Nigella's book "Feast" I was flicking through looking at a few recipes here, a few pictures there and suddenly I stopped. In front of me was a gorgeous photo of a pan of some type of muesli creation, golden brown and full of whole almonds. What is this glorious creation?, I thought.
'Granola??? What the %*!# is granola again? Ohhhh - it's that thing they eat in America. Comes in boxes? Ramona Quimby ate granola cookies? Hmmmmm.....'
After looking through the ingredients, I knew it was something I wanted to make, but I forgot about it for a few months until I found myself in a health-food store this week looking at jars of brown rice syrup. Something was nibbling away in my mind....rice syrup, rice syrup, where have I read that as an ingredient? So, I bought it and today made my own American-style granola breakfast cereal courtesy of a British chef, in my Australian kitchen.
It's very easy to make, but it took me a little time to break up the clumps that had formed during the baking process. I didn't want big chunks of cereal, so spent some time evening the texture a bit.
I was worried as I made it. The oats smelled a bit too 'oaty' and despite the spices and apple sauce, the raw mixture tasted like bland muesli. I could foresee I wasn't going to enjoy this much, and thought about how many friends might enjoy a foodie present. I baked it up and tasted it again. Still meh. It tasted like a health-food shop. Ahh well, it was fun and I know other people would like it.
But, after I plated a portion for the photo above with a spoonful of natural yoghurt and a drizzle of brown rice syrup (yes, that's rice syrup, not honey in the photo - and yummy stuff it is too), I took a spoonful and suddenly it all came together! It all made sense to me! The crunchy, cautiously sweet, oaty, nutty cereal, with the thick tangy yoghurt and gooey sweet syrup created something wonderful!
So, I think I'm a convert to this granola creation. I'd better be; I have about 5 litres of the stuff to get through!! And it doesn't go soggy!
Read on for the recipe:


Andy's Fairfield Granola
From Nigella Lawson's 'Feast '


450g rolled oats
120g sunflower seeds (kernals)
120g white sesame seeds
175g apple sauce
2 teaspoons ground cinnamon
1 teaspoon ground ginger
120g brown rice syrup (found in health shops. Otherwise use golden syrup)
4 tablespoons runny honey
100g light brown sugar
250g whole natural almonds
1 teaspoon Maldon salt
2 tablespoons sunflower oil
300g raisins

Mix everything except the raisins together very well in a large mixing bowl with some large spatulas or salad spoons.
Spread the mixture out on two baking tins (the sort that come with ovens, and are about the width of a rack) and bake in a 170C oven, turning over about halfway through baking and re-distributing the granola evenly furing the baking process. The object is to get it evenly golden without toasting too much in any one place. This should take anything from about 40 minutes to an hour.
Once it's baked, allow to cool and mix together with the raisins. Store airtight.
Eat with milk for breakfast, with a spoon of natural yoghurt or by the handful.


Continue reading